Five Things.

Louisville skyline from the top of the walking bridge, Big Four Bridge. 
 Lavender Lemonade from one of my fav spots, garage bar
Giant chalkboard wall outside of Speed’s market location. 
I went with something in the vein of my wanderlust rather then earth-shattering.
“eat sushi in japan”
Derby pins at WhyLouisville
I just love Derby.
I was tempted to buy this hipster flyswatter. 
My little sister-in-laws came to town last weekend for a visit! J and I love having guests. It gets us out and about town to see/do things that have been on our list for some time, but haven’t gotten around to doing yet because we’re lazy.
We packed a LOT into just 2 days (midnight frozen yogurt, sky zone, walking bridge and riverfront, batman movies, hibachi, homemade ice cream), but the highlight was definitely just spending time together. They’re such sweet girls, and we’re lucky to have them in our lives. 
Have a great weekend! 

Peach Galette

My dear friend Taylor had gone out to Huber’s farm with some friends the other day, and was so sweet to drop by after with some lovely ripe peaches. 
I had a disk of pie crust in the freezer from strawberry extravaganza post-my own trip to Huber’s a few weeks back. 
[Unknowingly at first, the pie crust recipe i made was a double batch.] 
In an effort to not have a repeat fruit-pie, I decided on a galette to best use the quickly ripening beauties.  I’ve never made one, and, moment of truth…making pies look cute is hard for me. There’s definitely an art to making an aesthetically pleasing pie crust. A skill I am no where near perfecting, and to be honest, am not totally interested in working on. 
Plus, “galette” sounds so much fancier, right?!
It’s fun to say.
Go on… Galette
For this rustic treat, I adapted from the tried and true Martha herself. I decreased the sugar to 1/4 c because these peaches were just so sweet on their own.
It is so yummy!! and pleasing to the eye. I will def keep this in my recipe box.  
Thanks, Tay!
xox

Brow Business

Truth: You need to be filling in your brows.
Yes, you.

Your brows are awesome, you say?

You should still comb them, and fill in the blanks.
Especially if you’re doing anything that’s captured on film.

As the years have passed, my opinion of must-do make up essentials has shifted. I used to think that if you only had 2 minutes before running out the door, mascara and under eye concealer were the barebones absolute musts. 
Now I know, cover imperfections and fill your brows

1. Start with good lighting. Natural light works best, or a lighted makeup mirror is fantastic as well. With a clean comb (like the one on the end of this brush), comb your brow hairs up and use a small scissor to trim long edges beyond your natural shape.

2. In shaping your brows, hold a pencil along the edge of your nose strait up to see where the edge of your brow should begin.
Hold it on a diagonal line from your nose the outer edge of your eye to see where it should end.
A diagonal line from the edge of your nostril to your outer iris will show you where the arc should sit.

3. I love these wax stickers. They have a natural arc shape and make for easy shaping and quick, no-fuss cleanup.
Also, these stencils are fantastic for giving you a dummy-proof shape to fill in. Line the stencil up according to guidelines from #2, fill your whole brow in with a white eye pencil, remove the stencil, then tweeze or wax any hairs that aren’t white! voila.

4. For water proof all day wear, I love this liquid-gel brow cream. If your brows are naturally sparse, this is great for filling in all the gaps. Use short strokes with a stiff angled brush from #1, starting at the inner corner moving out to the arc.  It lasts long, but doesn’t come in light shades.

5. This powder is user friendly and comes in a variety of shade for every hair color. You should chose 1 shade darker then your hair color. Two colors on each pallet allow for a perfect match.

Keep in mind: 

*Your brows are sisters, not twins *
They will not match perfectly. Ever. so give it up and figure out your “good side”

*they’re brows, not tadpoles*
It’s just not a cute look.

*don’t over-tweeze*
seek professional help if you are in doubt

xox

Tipsy Tuesday: Ginger Mint Fizz

1/2 oz honey simple syrup
1/2 oz fresh lemon juice
1 1/2 oz Gin
8-10 mint leaves
ginger ale
pour lemon and honey simple syrup into the bottom of a high-ball glass. 
Add mint leaves and muddle well to release the mint.
 Add the gin
Fill the glass to the top with ice
Top with ginger ale
stir gently.
This is a light and refreshing libation. The mint is strong and fresh, with a subtle ginger-sweet undertone. If you love a super-sweet drink, this isn’t it. 
Also, this is my first original cocktail creation! 
yaa-hoo.

DIY: Gilded Vase

I’ve been feeling a bit crafty lately.
And with summer in full bloom, what better to tackle then a gilded vase!
I was inspired by a Pintrest pin, the lovely flowers i saw at whole foods, and the recent glassware sale at hobby lobby (50% off, yes please).
You’ll need:
A good gold metallic spray paint
Painters tape
and cheap glassware (the round one above was 5.99 +50% off)
 I taped various designs, some worked out, some not so much. I eyed it with all my designs. It doesn’t have to be perfect- but considering- they turned out pretty darn even.
My fav metallic spray paint.

after two coats, I allowed everything to dry for about 3 hours. Then, carefully peeled away the tape. 
[This is where one of them got a bit botched]. 
Also, take care while spraying to avoid getting specks inside the glassware. I had a few stray specks which i was able to scrub out with warm water and a scouring pad. 
Overall, I am super pleased with the results! The pop of gold and bright colored blooms on the coffee table is a summer delight. 

Natural Jewelry Cleaning

Rings and watch bands get really dirty with everyday wear.
Lotions, perfume, body-oils… it builds up. Every few weeks I like to clean my rings so they sparkle like new! Harsh chemical cleaners can strip protective layers put on your fine jewelry, so i like to use a simple natural solution.
You’ll need:
white vinegar
baking soda
extra-soft bristled tooth brush
spray bottle
small dish/glass
paper towels

 mix a tablespoon of baking soda with just enough water to make a thick paste. 
Gently rub the paste into the nooks and crannies.
Fill the spray bottle with vinegar and spray the items until the baking soda bubbles. 
Continue to spray and gently rub with the tooth brush.
I like to then drop the rings into a small dish filled with vinegar to bubble off any excess baking soda and grime.
Rinse with hot water under the faucet (carefully! I always stop the drain to avoid any mishaps) and lightly polish with soft paper towels.
Your gems with sparkle like new!!

Year One

Yesterday was two wonderful occasions! Father’s day, and our one year anniversary of our marriage!
We spent the day viewing our guest book, looking through our wedding photos, watching the full cuts of the ceremony and reception and eating our wedding cake 
(it was just as good as it was that day after being frozen for a year!).  
Julio also had the idea to bring little “anniversary-o-grams” to our wedding party here in town that included memory-inducing sweets and booze (Bourbon balls, seelbach cookies, canned mojitos, mini bottles of maker’s mark, and a slice of wedding cake!). It was such a great idea and a lovely way to spend the afternoon running around town and dropping them on our loved ones doorsteps.
[it did tug my heart strings to be so far from my FL besties!]

Year One is the paper anniversary. Gifts from him included Tickets to Justin Timberlake, a frames wedding invitation, and a custom love-book! Gifts from me, the book 36 hours and a map to mark all of our travels with push-pins!

We had an amazing weekend reminiscing about our wedding! We spent the night in the beautiful suite we stayed in the night of our wedding, The Seelbach Suite at the Seelbach Hilton.  
We ate dinner at the hotel one evening in the ornate Oakroom, and at the Cuban restaurant where our rehearsal dinner was the next evening. It was so fun visiting these locations, reliving the amazing memories of the weekend.  

Bee’s Knees

For my birthday this year, we decided to do a last minute trip to a great bar here in town with some friends. St. Charles Exchange has a great atmosphere, and an extensive cocktail menu.  After tasting a few other drinks I landed on the “bee’s knees”.  
It’s so refreshingly light and sweet, i had to have a fourth, ahem, second. It’s a boozy adult lemonade and perfect for summer. I just had to try to recreate it, and did so quite successfully here.

My take on the “bee’s knees” from St. Charles Exchange
1  1/2 oz fresh lemon juice (strained; about 1 1/2 lemons)
1  1/2 oz Gin (I like Sapphire but St.CE uses Hendricks)
1  1/2 oz honey syrup *
add ingredients into a cocktail shaker with 6-8 ice cubes and shake for a full 30 seconds (don’t skimp! this is where homemade cocktails go wrong! ) 
Then strain into a pretty glass
* For the honey syrup: Dissolve 1/4 c of honey in a 1/2 c of lukewarm water using a small whisk. 

be careful….
It’s sooo good and you hardly taste the booze. You’ll want more then one!


Invest & Protect

So… I have a little itsy bitsy problem with handbags. 
I love them.
very much..
I think purses are an investment and I make caring for them a priority so they will have long lives. 
(I also dream of being able to pass down my designer bags to my teenage daughter one day so she can be super hip with her then-vintage Tory Burch or LouisV.)
Enter the newest member of my collection! 
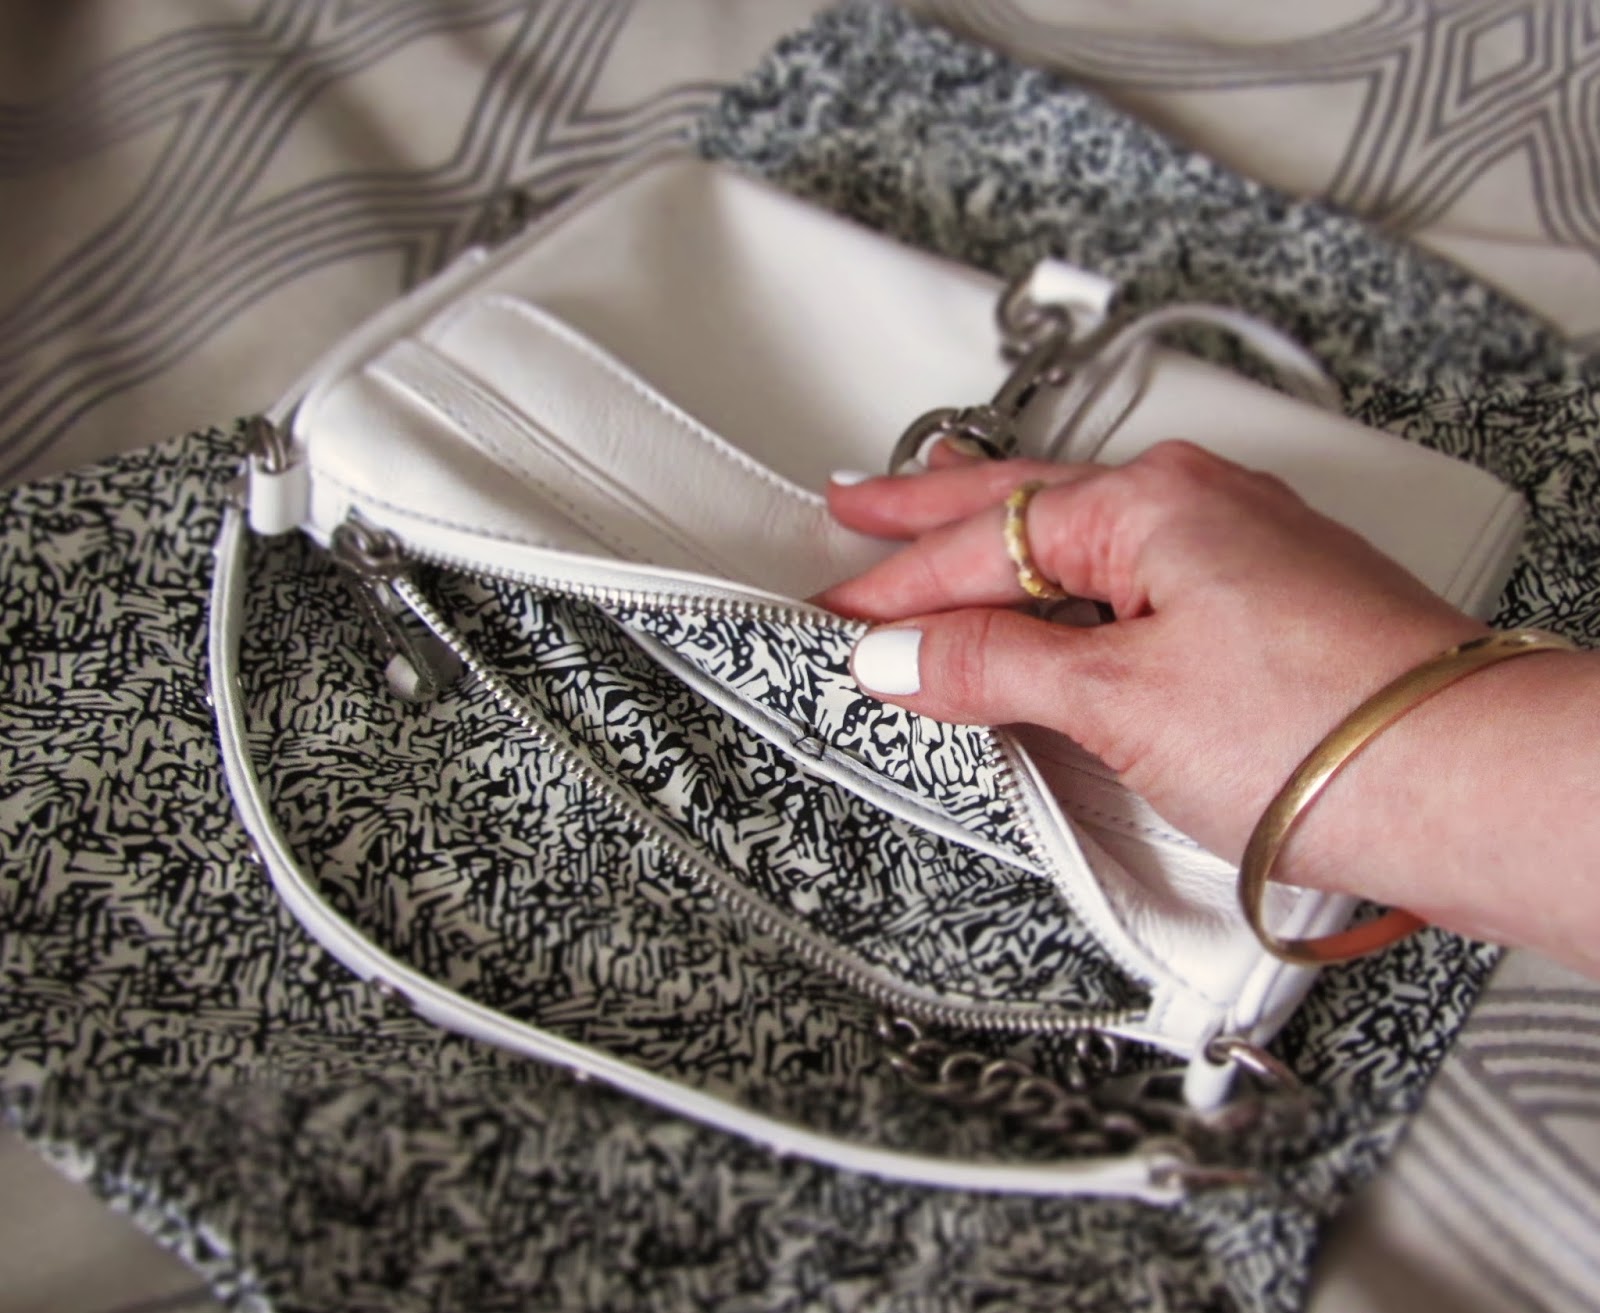
(Can you believe I didn’t have a white bag!? uhg, and side-note i would buy it in every color if i could…so versatile)

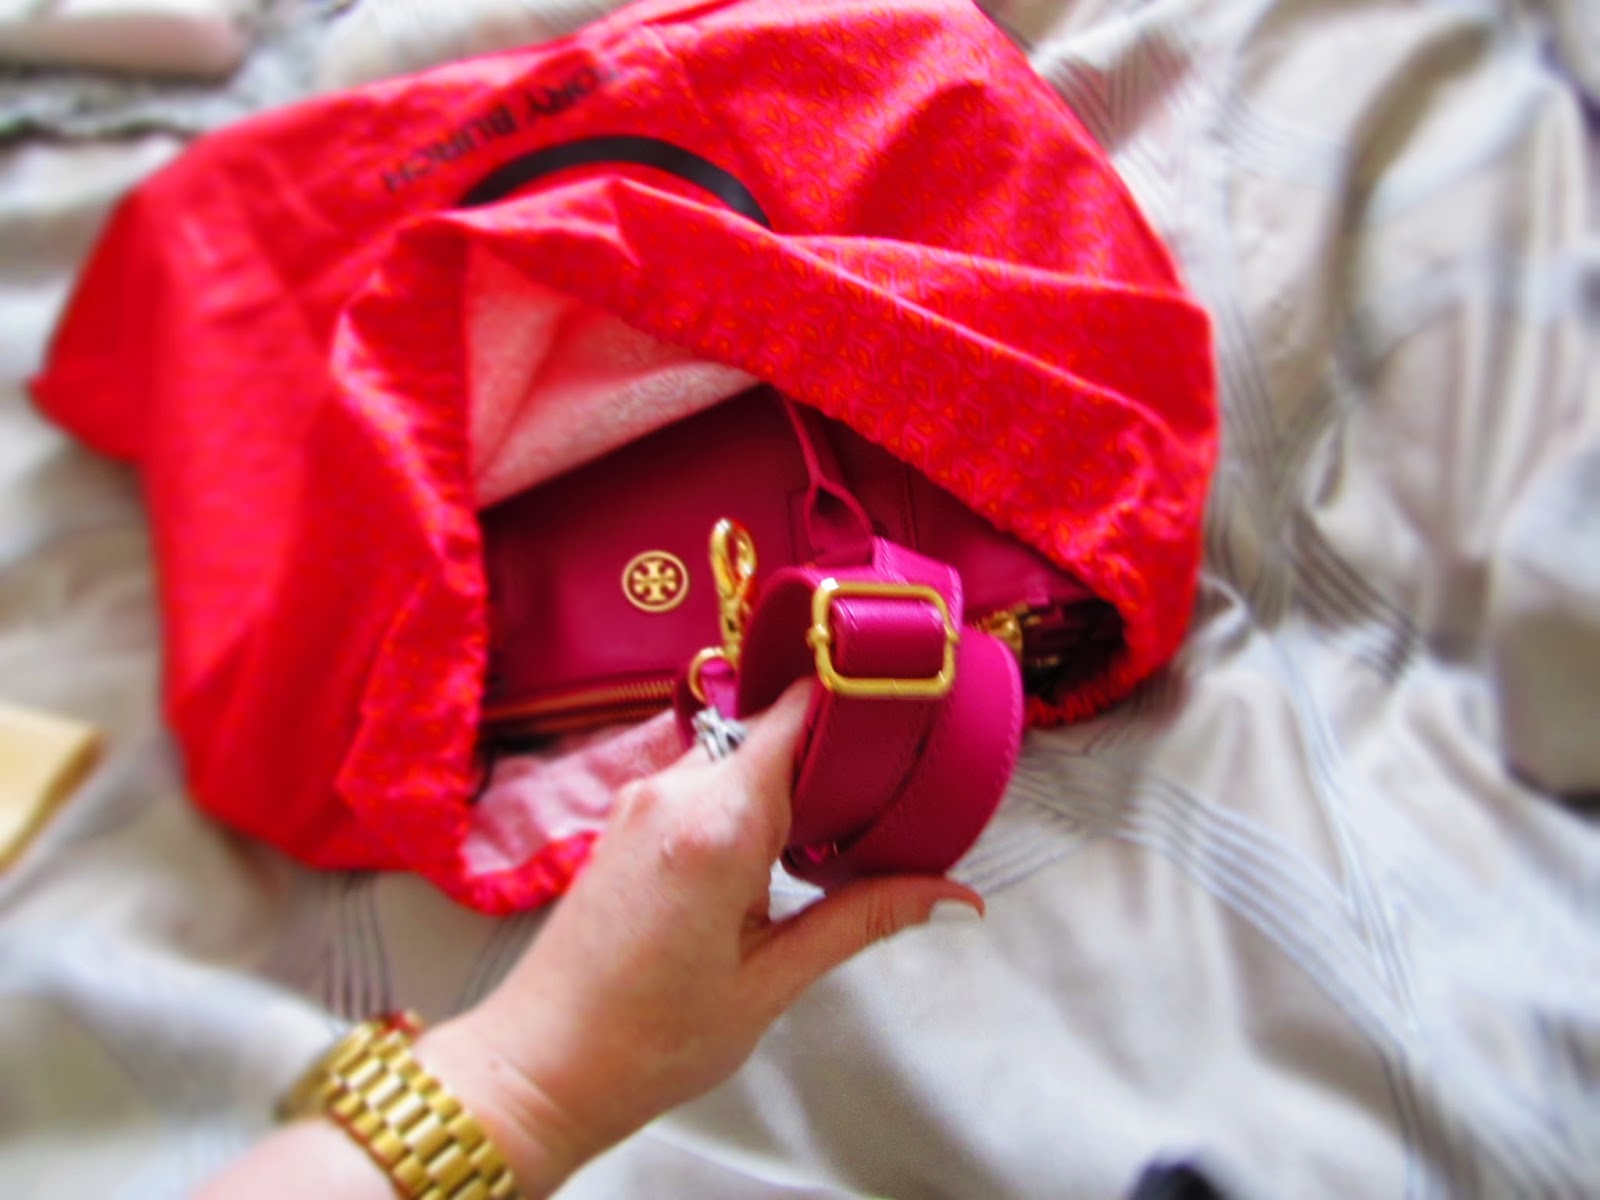
Tip 1: I make sure to have a dust-bag for every purse! 
Most good designer handbags come with this little necessity, but if a bag doesn’t you can order a cheap set on ebay.  This new one has a dust bag that matches the lining! so cute.

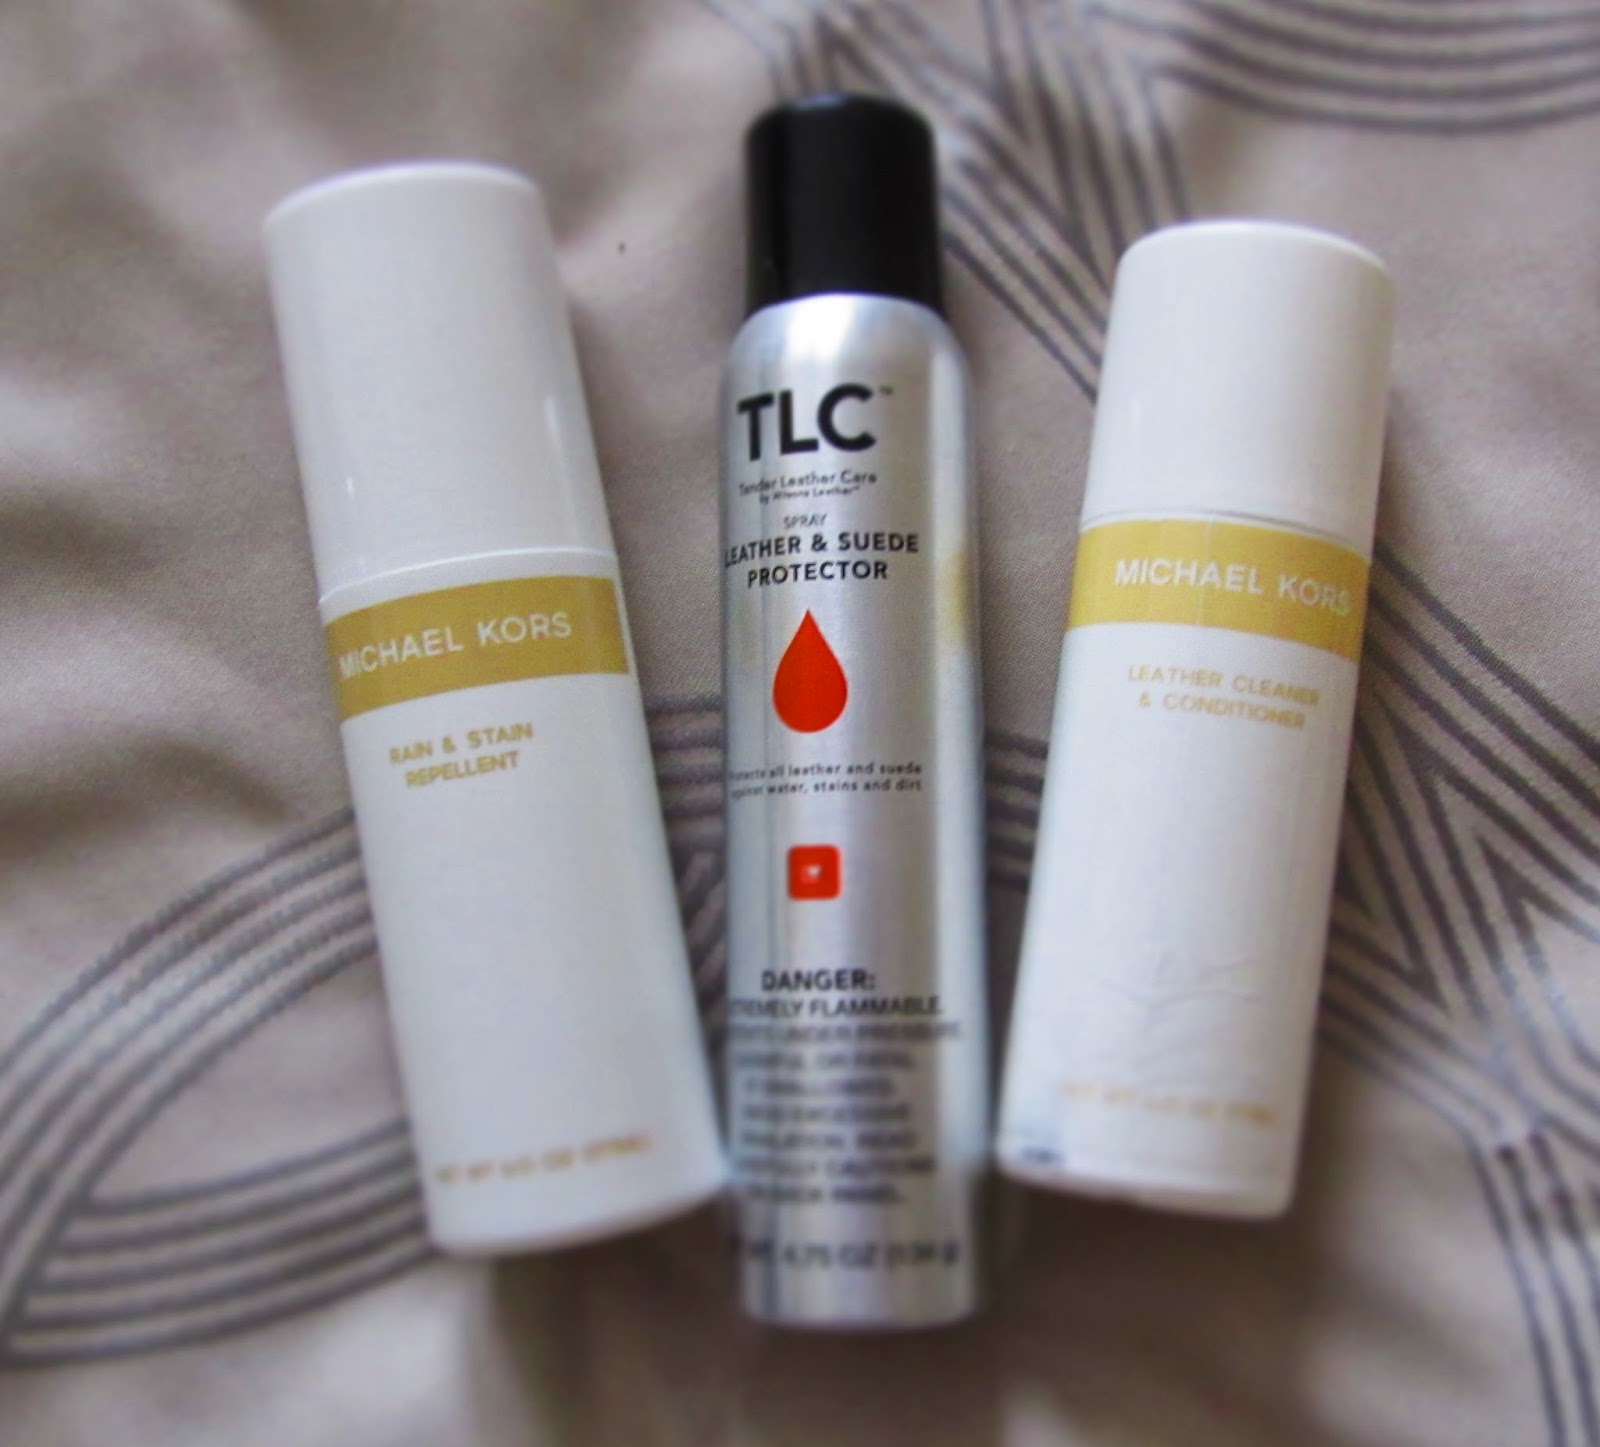
Tip 2: When you get a new leather bag, spray it with protector! 
I like the TLC brand above. In a well ventilated space – spray an even coat about 6-8 inches away from the bag. I wait about an hour, then go back and spray the most touched/used part of the bag again (ie. the bottoms, the handles, the back of this bag esp that will rub against jeans for example, I sprayed 3 times waiting an hour in between each spray). Let dry for at least 4-6 hours before using (overnight is best).

 Tip 3: Tie the handles out-side the bag.
This can help keep the shape extended properly, and help you pick out what the bag is easily if dust bags are all the same.
 Tip 4: remove long straps if you can, roll them up, and store inside the bag.
It will keep them from getting bent in funny places.
Tip 5: make sure they’re accessible and store properly!
I keep everything stored on two shelves on the side of my closet. top shelf for smaller bags and clutches, bottom for the larger options. It does require some effort to tug my clothes out of the way, but I keep a tap light just inside to help illuminate my options and make finding what i want a breeze! 
I try not shove, and make sure everything has just enough space to not get bent or misshapen.
Also, depending on how long i’ve been using the bag, I will clean and protect it again before rotating it back into my closet. That way it’s ready to go when I want to use it!
These extra steps will make those investments last a lifetime.

Strawberry Jam

I scoured the internet for recipes, read a few, and then decided to wing it.
4 Cups of sliced strawberries
1 cup of sugar
juice from 1 ripe lime
Combine everything in a saucepan, bring to a light boil for about 3-5 minutes, then reduce to medium heat and cook down until soupy and thickened. It took mine about 20 minutes on medium to medium-high heat.
I used much less sugar then other recipes  called for, but my strawberries were super-ripe and so naturally sweet. I wanted to highlight this rather then sugar-it out. 

Also… I really need a better camera.